Thursday, April 18, 2013

Mixing it up with Mojitos

Once the weather starts to warm up I begin thinking of my "official" summer cocktail.  Don't judge!  You know you do too.  Some may enjoy a icy cold beer or fruity margarita.  But for me nothing is more refreshing on a hot summer day then a Mojito.  If made correctly, it can be the most delicious cocktail you bring to your mouth.  However, please be advised.  This cocktail taste so light and refreshing, you may drink too much ;)

My first tip, NEVER EVER buy Mojito mixes.  You will be disappointed.  It's a simple drink to make and not worth spending a dime on pre-made rubbish.


The Perfect Mojito

16 ounce glass
1/2 lime, cut in wedges
4-5 fresh mint leaves
2 tsp sugar
2 ounces white rum
3-4 ice cubes
Sparkling water or club soda
Muddler

  1. Add lime wedges, mint and sugar to glass
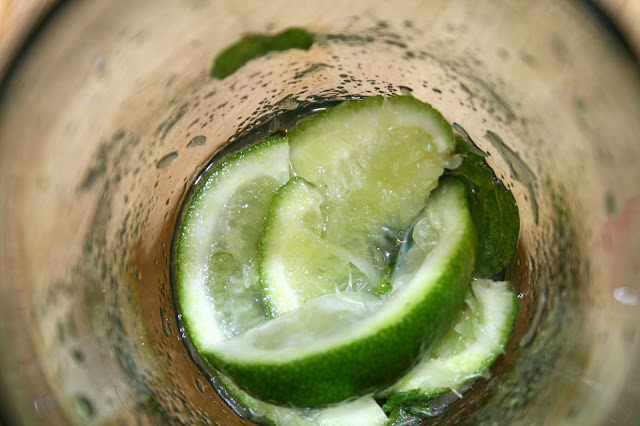
  2. Muddle the mixture until you have released most of the lime juice and dissolved all sugar
  3. Add 2 ounces of white rum
  4. Add ice and top off glass with sparkling water until full.
  5. You can mix the drink with a shaker.  But if you don't have one handy just stir with a long spoon, straw or beverage stirrer.
  6. Add a lime to the rim and last but no means least...ENJOY!!!

Wednesday, April 17, 2013

White Jambalaya

There are many ways to make Jambalaya.  The recipe I am about to share is considered a "White Jambalaya".  Meaning the rice was cooked separately from the other ingredients and incorporated after.  It can also be considered the "quick" way to make this tasty dish.

My version has a few important steps.  Don't stress!  They are all easy :)


Ingredients

1 pkg Al Fresco All Natural Chipotle Chorizo Chicken Sausage (you can use another brand that you may like), cut in slices
4 cups of cooked Jasmine rice
2 cups jumbo shrimp, raw with skins, cooked and chopped
1 red bell pepper, diced
1 medium yellow onion, diced
1 1/2 cups peas, frozen and soaked in water overnight.
1 tbsp Old Bay Seasoning
Oil for sauteing 
Salt and pepper to taste.
  1. Bring 4 cups of water and drop shrimp (with tail/shells on) in for 2 minutes.  Remove shrimp and rinse under cold water to prevent continuous cooking.  Remove the tails and shells, set aside.  Chop cooked shrimped into large chunks (in quarters)
  2.  To create the shrimp stock, bring 2 cups of water and shells to a boil.  Season with salt and pepper to taste.  Boil until liquid is reduced by almost half and set aside.
  3. While stock is reducing, start sauteing the vegetables (onions, mushroom, and peppers) and sausage.  Saute them all separately to avoid over cooking.  Add peas to sauteed mixture and set aside.
  4. Next cook the rice according to package.  But instead of using water, use the shrimp stock.
  5. Once rice is fully cooked, add the vegetable mixture, and Old Bay season.  Stir until well combined.
 There is no right or wrong way to prepare this dish.  Just have fun with it.  You can substitute or add any additional vegetables or beans. 

Monday, April 8, 2013

Welcome to New England!

A dessert commonly found in the New England area--Grape Nut Pudding.  Yum! I love just about anything with a custard.  It's a very light dessert that you can eat warm or cold.  Either way, its delicious!  I won't waste much time talking about how good it is, lets get making it....


Grape Nut Pudding
  • 3/4 cup Grape-Nuts cereal
  • 4 cups whole milk
  • 4 eggs
  • 2 teaspoons vanilla extract
  • 1/2 cup sugar
  • 1/2 teaspoon cinnamon
  • 1/4 teaspoon salt
  1. Preheat the oven to 350°F. Grease the bottom and sides of ramekins.
  2. Place the Grape-Nuts cereal in a large bowl and set aside. Warm the milk on the top of stove in a small saucepan.  Only heat until scalding.  Don't bring to a boil!   
  3. Add warm milk to Grape-Nuts.  Allow to stand for about 5 minutes.
  4. While the cereal soaks, beat the eggs and add the vanilla extract, sugar, cinnamon and salt. Beat lightly until the sugar is dissolved.
  5. Add a bit of the warm milk to the eggs, 1 or 2 tablespoons at a time to temper them. Once you've added about a half cup of the milk to the eggs, add the entire mixture to the milk and cereal. Stir to combine and pour into the ramekins.
  6. Place the ramekins in a large roasting pan and add hot water to the outer pan until it reaches about half way. Place the pan in the oven and bake, 45 to 50 minutes or until a knife inserted into the center comes out clean.
  7. Carefully remove the pudding from the water-filled outer container and set on a cooling rack to cool completely.
  8. Makes 12 servings

Monday, April 1, 2013

Herbs: The Beginning

There are many flavors you can add to your dish when using herbs.  Dried herbs can help in a pinch.  No pun intended!! ha ha.  However, they can't beat the flavor and aroma when using fresh herbs.  You can find fresh herbs in your local grocery store but it comes at a price.  I find the herbs are often wilted and don't even look healthy enough to mix in your dish.  Who wants brown mint in your freshly made Mojito?  Dry shriveled basil on your Caprese salad, anyone?? NOPE!  I decided to give those so-called "fresh" herbs the finger.  My green thumb!!!  What did you think I was referring to?!

Even if you haven't had much luck at gardening, herbs are perfect for beginners.  What makes them even better, you can grow them indoors.  We live in a condo and unfortunately don't have the ability to garden.  But what we do have are beautiful windows that provide great light for our little herbs.

What to grow?

I kept it simple and decided to grow what I will use often.  It's my first time growing herbs and don't want to get ahead of myself.  I chose Basil, Cilantro, Parsley, Chive and Sage.  You can purchase herb plants or seeds.  I got a Basil plant and seeds for the others.  I guess I was feeling a little ambitious that day.  Also, you could purchase a couple plants to get you started if seeds are the route you're going to take.  It takes awhile to produce a plant, so don't expect to use your herbs for awhile.

What you will need?

You need to have a good spot in your home that gets at least 6 hours of light.  I chose our living room because we have 5 large windows that are perfect.  If you have a spot in your kitchen, thats even better!  You won't have to go far when cooking.

After you have determined location you can choose the type of pot.  I chose to plant in individual terracotta pots. Although, the plain looking pot wasn't going to satisfy this goat.  I bought chalkboard paint!  I kept the rust color inside to give a contrast in color against the black.  How do they look?

This really jazzes up the pots.  It gives it a rustic, DIY look.  Move over Martha Stewart!!!

Next, choose your soil.  Since your planning to eat what your growing, its a good idea to use an organic soil.  When you grow plants in containers, it's important to provide them with a high quality potting soil. What you're looking for is a soil that is loose and well drained. A popular mix for container grown plants can be made by combining equal parts of potting soil, peat moss, and perlite (or vermiculite).

Now you're ready to pot!
  1. Fill the pot with soil about three quarters of the way up.
  2. Moisten the soil lightly with water until moist but not wet.
  3. Remove the herbs from their containers, loosening the soil at the root base, taking care not to damage the roots.
  4. Evenly space the herbs in the pot and fill with enough potting soil to cover to the top of the root ball.
  5. Pat the soil down lightly and water well when finished.
If you're using seeds, follow the directions on the packet.

Here are my little herbs enjoying some sun.  It's been a week since I potted and already have little green sprouts in my Chive, Parsley and Cilantro pots.  Haven't seen any action from the Sage just yet.  "C'mon Sage, you can do it!!"  A little encouragement never hurt anyone! 

Stay tuned.....