Thursday, April 18, 2013

Mixing it up with Mojitos

Once the weather starts to warm up I begin thinking of my "official" summer cocktail.  Don't judge!  You know you do too.  Some may enjoy a icy cold beer or fruity margarita.  But for me nothing is more refreshing on a hot summer day then a Mojito.  If made correctly, it can be the most delicious cocktail you bring to your mouth.  However, please be advised.  This cocktail taste so light and refreshing, you may drink too much ;)

My first tip, NEVER EVER buy Mojito mixes.  You will be disappointed.  It's a simple drink to make and not worth spending a dime on pre-made rubbish.


The Perfect Mojito

16 ounce glass
1/2 lime, cut in wedges
4-5 fresh mint leaves
2 tsp sugar
2 ounces white rum
3-4 ice cubes
Sparkling water or club soda
Muddler

  1. Add lime wedges, mint and sugar to glass
  2. Muddle the mixture until you have released most of the lime juice and dissolved all sugar
  3. Add 2 ounces of white rum
  4. Add ice and top off glass with sparkling water until full.
  5. You can mix the drink with a shaker.  But if you don't have one handy just stir with a long spoon, straw or beverage stirrer.
  6. Add a lime to the rim and last but no means least...ENJOY!!!

Wednesday, April 17, 2013

White Jambalaya

There are many ways to make Jambalaya.  The recipe I am about to share is considered a "White Jambalaya".  Meaning the rice was cooked separately from the other ingredients and incorporated after.  It can also be considered the "quick" way to make this tasty dish.

My version has a few important steps.  Don't stress!  They are all easy :)


Ingredients

1 pkg Al Fresco All Natural Chipotle Chorizo Chicken Sausage (you can use another brand that you may like), cut in slices
4 cups of cooked Jasmine rice
2 cups jumbo shrimp, raw with skins, cooked and chopped
1 red bell pepper, diced
1 medium yellow onion, diced
1 1/2 cups peas, frozen and soaked in water overnight.
1 tbsp Old Bay Seasoning
Oil for sauteing 
Salt and pepper to taste.
  1. Bring 4 cups of water and drop shrimp (with tail/shells on) in for 2 minutes.  Remove shrimp and rinse under cold water to prevent continuous cooking.  Remove the tails and shells, set aside.  Chop cooked shrimped into large chunks (in quarters)
  2.  To create the shrimp stock, bring 2 cups of water and shells to a boil.  Season with salt and pepper to taste.  Boil until liquid is reduced by almost half and set aside.
  3. While stock is reducing, start sauteing the vegetables (onions, mushroom, and peppers) and sausage.  Saute them all separately to avoid over cooking.  Add peas to sauteed mixture and set aside.
  4. Next cook the rice according to package.  But instead of using water, use the shrimp stock.
  5. Once rice is fully cooked, add the vegetable mixture, and Old Bay season.  Stir until well combined.
 There is no right or wrong way to prepare this dish.  Just have fun with it.  You can substitute or add any additional vegetables or beans. 

Monday, April 8, 2013

Welcome to New England!

A dessert commonly found in the New England area--Grape Nut Pudding.  Yum! I love just about anything with a custard.  It's a very light dessert that you can eat warm or cold.  Either way, its delicious!  I won't waste much time talking about how good it is, lets get making it....


Grape Nut Pudding
  • 3/4 cup Grape-Nuts cereal
  • 4 cups whole milk
  • 4 eggs
  • 2 teaspoons vanilla extract
  • 1/2 cup sugar
  • 1/2 teaspoon cinnamon
  • 1/4 teaspoon salt
  1. Preheat the oven to 350°F. Grease the bottom and sides of ramekins.
  2. Place the Grape-Nuts cereal in a large bowl and set aside. Warm the milk on the top of stove in a small saucepan.  Only heat until scalding.  Don't bring to a boil!   
  3. Add warm milk to Grape-Nuts.  Allow to stand for about 5 minutes.
  4. While the cereal soaks, beat the eggs and add the vanilla extract, sugar, cinnamon and salt. Beat lightly until the sugar is dissolved.
  5. Add a bit of the warm milk to the eggs, 1 or 2 tablespoons at a time to temper them. Once you've added about a half cup of the milk to the eggs, add the entire mixture to the milk and cereal. Stir to combine and pour into the ramekins.
  6. Place the ramekins in a large roasting pan and add hot water to the outer pan until it reaches about half way. Place the pan in the oven and bake, 45 to 50 minutes or until a knife inserted into the center comes out clean.
  7. Carefully remove the pudding from the water-filled outer container and set on a cooling rack to cool completely.
  8. Makes 12 servings

Monday, April 1, 2013

Herbs: The Beginning

There are many flavors you can add to your dish when using herbs.  Dried herbs can help in a pinch.  No pun intended!! ha ha.  However, they can't beat the flavor and aroma when using fresh herbs.  You can find fresh herbs in your local grocery store but it comes at a price.  I find the herbs are often wilted and don't even look healthy enough to mix in your dish.  Who wants brown mint in your freshly made Mojito?  Dry shriveled basil on your Caprese salad, anyone?? NOPE!  I decided to give those so-called "fresh" herbs the finger.  My green thumb!!!  What did you think I was referring to?!

Even if you haven't had much luck at gardening, herbs are perfect for beginners.  What makes them even better, you can grow them indoors.  We live in a condo and unfortunately don't have the ability to garden.  But what we do have are beautiful windows that provide great light for our little herbs.

What to grow?

I kept it simple and decided to grow what I will use often.  It's my first time growing herbs and don't want to get ahead of myself.  I chose Basil, Cilantro, Parsley, Chive and Sage.  You can purchase herb plants or seeds.  I got a Basil plant and seeds for the others.  I guess I was feeling a little ambitious that day.  Also, you could purchase a couple plants to get you started if seeds are the route you're going to take.  It takes awhile to produce a plant, so don't expect to use your herbs for awhile.

What you will need?

You need to have a good spot in your home that gets at least 6 hours of light.  I chose our living room because we have 5 large windows that are perfect.  If you have a spot in your kitchen, thats even better!  You won't have to go far when cooking.

After you have determined location you can choose the type of pot.  I chose to plant in individual terracotta pots. Although, the plain looking pot wasn't going to satisfy this goat.  I bought chalkboard paint!  I kept the rust color inside to give a contrast in color against the black.  How do they look?

This really jazzes up the pots.  It gives it a rustic, DIY look.  Move over Martha Stewart!!!

Next, choose your soil.  Since your planning to eat what your growing, its a good idea to use an organic soil.  When you grow plants in containers, it's important to provide them with a high quality potting soil. What you're looking for is a soil that is loose and well drained. A popular mix for container grown plants can be made by combining equal parts of potting soil, peat moss, and perlite (or vermiculite).

Now you're ready to pot!
  1. Fill the pot with soil about three quarters of the way up.
  2. Moisten the soil lightly with water until moist but not wet.
  3. Remove the herbs from their containers, loosening the soil at the root base, taking care not to damage the roots.
  4. Evenly space the herbs in the pot and fill with enough potting soil to cover to the top of the root ball.
  5. Pat the soil down lightly and water well when finished.
If you're using seeds, follow the directions on the packet.

Here are my little herbs enjoying some sun.  It's been a week since I potted and already have little green sprouts in my Chive, Parsley and Cilantro pots.  Haven't seen any action from the Sage just yet.  "C'mon Sage, you can do it!!"  A little encouragement never hurt anyone! 

Stay tuned.....


Sunday, March 24, 2013

Broiled Flank Steak with Roasted Potatoes and Creamed Spinach

Filet Mignon.  Nah!  Although it's a delicious cut of beef, we need to consider our wallets on occasion.  Flank is fairly inexpensive.  It can be an easy and versatile meat to cook.  There are a couple ways you could prepare it.  The first is to marinate for a lengthy amount of time.  Some recipes recommend 3-5 hours and others up to 24 hours.  Choosing this method will depend on how much time in advanced you've planned.  But, like most people, we don't always have that luxury.  That's where the second option could come in handy.  The quickest way possible is tenderizing.  Use a tenderizing hammer or slightly score the meat before rubbing your choice of seasoning.  Flank can be a tough cut.  Tenderizing it first allows the collagen to break up and become more palatable.  Once you have established which method you want to use, you can proceed with the broiling or grilling process.

I decided to accompany my flank steak with roasted potatoes and creamed spinach.  The juicy, saltiness of the meat engaging with the soft starchiness of the potatoes and smooth creamy taste of warm spinach mixture...well yes, its magnificent!!  Hope you enjoy this dish as much as the goat ;)

Red bliss potatoes with fresh basil, salt pepper, and olive oil.  Roast in the oven at 400 degrees for 45 minutes or until browned and crisp.
I chose the "quick" method.  Seasoned with salt, pepper and oregano.  I added spicy brown mustard and Worcestershire sauce for moisture.

Allow steak to rest for 10 minutes before slicing.  Thinly slice at an angle.  Make sure to cut against the grain!
Roux (butter and flour)
Garlic and Onions added to Roux
Fresh spinach sauteed
Bon Appetit!

Flank Steak
  • 1 1/2 pound Flank stead (or desired amount to feed your guests)
  • Salt
  • Pepper
  • Oregano
  • 1 tablespoon spicy brown mustard
  • 1/2 tablespoon Worcestershire sauce
  1. Preheat oven broiler, highest setting.
  2. Slightly score or tenderize flank steak.  Rub season, mustard and Worcestershire until well coated.
  3. Broil steak for 5 minutes on each side.  130-140 degree internal temp.  Remove steak and let rest for 10 minutes on a cutting board.
  4. Cutting against the grain, thinly slice on an angle.

Creamed Spinach
  • 1 stick Butter
  • 8 Tablespoons Flour
  • 1/2 whole Medium Onion, Finely Diced
  • 3 cloves Garlic, Finely Minced
  • 2 cups Milk
  • Salt And Pepper, to taste
  • 1 pinch Ground Nutmeg
  • 3 Tablespoons Butter
  • 24 ounces, weight Baby Spinach
  1. Melt 1 stick of butter in a pot. Sprinkle in flour and whisk together. Cook over medium heat for five minutes or until light golden brown. Throw in onion and garlic and stir together, cooking for another minute. Pour in milk, whisking constantly, and cook for another five minutes while you cook the spinach.
  2. To cook spinach, melt 3 tablespoons butter in a separate pot. Add spinach in increments until all incorporated, and cook until wilted but not soggy, about 4 to 5 minutes.
  3. Season the cream sauce with salt, pepper, and nutmeg. Add spinach to the cream sauce, stirring gently to combine. Serve immediately.

Tuesday, March 19, 2013

March Madness!

I've been a "New England-er" my whole life.  We have a beautifully colored fall, hot and humid summer days, shovel until your back aches winters and "who knows what the hell will happen" spring!  Right now we are experiencing the "who the hell knows".  I'm sure wherever you live, there is something to complain about.  "The grass is always greener" In this case its true!  We don't have green grass yet. HA HA.  Clearly the weather has affected my ability to provide a good joke.  Moving right along...

It's been snowing, sleeting, raining, snowing again.  This type of weather makes you want to stay inside, snuggle with that special someone and eat delicious food.  I don't know about you, the eating something delicious is the most appealing to me at the moment (I know my boyfriend would agree!).  Here are a few things I am looking for.  #1: Must be warm!!  #2: A little sweetness never hurt anyone.  Lastly, #4: Simple.  After a long day of work in this weather, I don't want to spend the rest of my evening in the kitchen.  Still need to snuggle with my special someone ;)

The winner is...drum roll please...


I used Granny Smith apples because they were on sale this week at the grocery store.  But you can use a mix of another apple.
Peeled, cored, and sliced
Mixed dry ingredients
Butter, slowly added to dry ingredients to create a light crumb
I used Maple Walnut ice cream to serve with my warm apple crisp.  HEAVEN!!


Warm Apple Crisp
  • 1 cup all-purpose flour
  • 3/4 cup rolled oats
  • 1 cup packed brown sugar
  • 1 teaspoon ground cinnamon
  • 1/2 cup butter, softened
  • 4 whole apples, peeled/cored/sliced
  • 1 cup sugar
  • 2 tablespoons cornstarch
  • 1 cup water
  • 1 teaspoon vanilla extract
  • ice cream, optional
  1. In a large bowl, combine first four ingredients. Cut in butter until crumbly. Press half into a greased 2-1/2-qt. baking dish or a 9-in. square baking pan. Cover with apples.
  2. In a small saucepan, combine the sugar, cornstarch, water and vanilla. Bring to a boil; cook and stir for 2 minutes or until thick and clear. Pour over apples. Sprinkle with remaining crumb mixture.
  3. Bake at 350° for 60-65 minutes or until apples are tender. Serve warm, with ice cream if desired. 

Friday, March 15, 2013

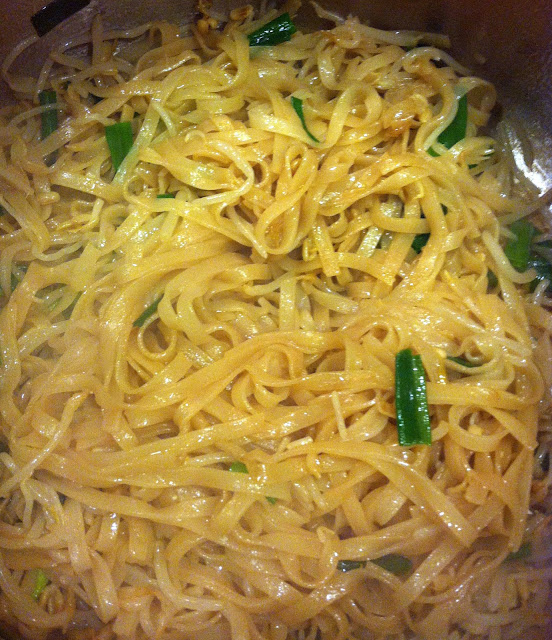
Chicken Pad Thai

"Hello, may I please have an order of Chicken Pad Thai??"

We all love take out.  But sometimes it can add up to a big chunk of change.  We usually get Chinese, Japanese or Thai cuisine for our choice of take out.  This time I was craving Thai!  I really love Chicken Pad Thai.  Such a simple dish and probably one of the most commonly known. Unfortunately, we don't have many Thai restaurants close to home.  What do you do in a situation like that??  Ignore your cravings and choose something else? NOPE!  You make it yourself!!!!


  • 1/2 pound narrow dried rice noodles
  • 2 ounces boneless chicken, thinly sliced and cut into small chunks or strips.
  • 1 teaspoon sugar (preferably palm sugar, although light brown or granulated will work just fine)
  • 1 heaping tablespoon tamarind pulp dissolved in 2 to 3 tablespoons warm water (or substitute 1 tablespoon rice vinegar plus 1 tablespoon water)
  • 1 tablespoon soy sauce
  • 1 tablespoon fish sauce
  • 3 large eggs
  • pinch salt
  • 3 tablespoons peanut oil or mild vegetable oil
  • 2 to 3 cloves garlic, minced
  • 1/2 pound (a scant 4 cups) bean sprouts, rinsed and drained
  • 3 scallions, trimmed, smashed with the flat side of a knife and cut into 1 1/2 inch lengths
  • 1 cup roasted peanuts, coarsely chopped 
  1. Soak the rice noodles in very, very warm water for 20 minutes.
  2. Meanwhile, place the chicken in a small bowl, add the sugar, and toss to coat. In a medium bowl, combine the tamarind water (or rice vinegar and water), soy sauce, and fish sauce. In a small bowl, lightly beat the eggs and a pinch of salt.
  3. Place a large wok or ginormous skillet over high heat. (You need a large wok to prepare this amount of noodles, as the noodles take up a lot of room, and you need to be able to push some ingredients up the sides of the wok while you cook other ingredients. If your wok is small, make this recipe in two batches.) Add about 1 1/2 tablespoons of the oil to the pan. When the oil is hot but not smoking, add the garlic and stir-fry briefly just until it begins to change color, about 15 seconds. Toss in the chicken and stir-fry until it changes color but aren’t cooked through, 1 minute or less.  Pour in the egg mixture and let it cook just until it starts to set around the chicken, less than a minute. Use your spatula to cut the omelet into large pieces, then transfer everything to a plate and set aside.
  4. Return the wok to high heat. Add the remaining 1 1/2 tablespoons oil and swirl to coat. Toss the drained noodles into the wok and stir-fry vigorously, pressing them against the hot wok briefly to sear them, then turn them and press them against the side of the wok again. The noodles will initially seem dry and unwieldy, but don’t worry, just keep folding them over and pressing them onto the wok - after about 1 minute, they will have softened more and be warm. Move the noodles up the sides of the wok and toss in 2 to 2 1/2 cups of the bean sprouts and the scallions. Stir-fry vigorously for about 20 seconds, pressing them against the hot wok and turning them so they wilt. Add the soy sauce mixture. Stir-fry for about another 30 seconds, gradually incorporating noodles into the bean sprout mixture. Add the reserved egg-meat mixture and toss gently to mix everything together.
  5. Turn the noodles out onto a platter or onto individual plates. Sprinkle some of the chopped peanuts onto the noodles.