Sunday, March 24, 2013

Broiled Flank Steak with Roasted Potatoes and Creamed Spinach

Filet Mignon.  Nah!  Although it's a delicious cut of beef, we need to consider our wallets on occasion.  Flank is fairly inexpensive.  It can be an easy and versatile meat to cook.  There are a couple ways you could prepare it.  The first is to marinate for a lengthy amount of time.  Some recipes recommend 3-5 hours and others up to 24 hours.  Choosing this method will depend on how much time in advanced you've planned.  But, like most people, we don't always have that luxury.  That's where the second option could come in handy.  The quickest way possible is tenderizing.  Use a tenderizing hammer or slightly score the meat before rubbing your choice of seasoning.  Flank can be a tough cut.  Tenderizing it first allows the collagen to break up and become more palatable.  Once you have established which method you want to use, you can proceed with the broiling or grilling process.

I decided to accompany my flank steak with roasted potatoes and creamed spinach.  The juicy, saltiness of the meat engaging with the soft starchiness of the potatoes and smooth creamy taste of warm spinach mixture...well yes, its magnificent!!  Hope you enjoy this dish as much as the goat ;)

Red bliss potatoes with fresh basil, salt pepper, and olive oil.  Roast in the oven at 400 degrees for 45 minutes or until browned and crisp.
I chose the "quick" method.  Seasoned with salt, pepper and oregano.  I added spicy brown mustard and Worcestershire sauce for moisture.

Allow steak to rest for 10 minutes before slicing.  Thinly slice at an angle.  Make sure to cut against the grain!
Roux (butter and flour)
Garlic and Onions added to Roux
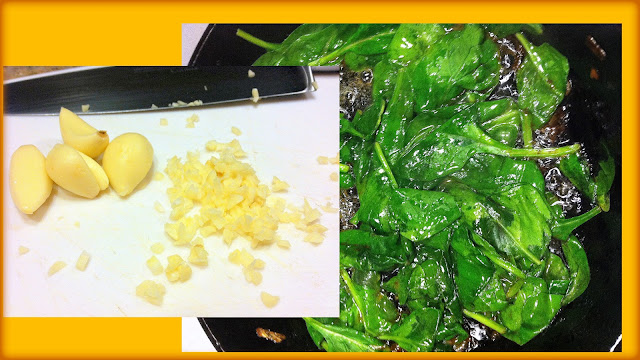
Fresh spinach sauteed
Bon Appetit!

Flank Steak
  • 1 1/2 pound Flank stead (or desired amount to feed your guests)
  • Salt
  • Pepper
  • Oregano
  • 1 tablespoon spicy brown mustard
  • 1/2 tablespoon Worcestershire sauce
  1. Preheat oven broiler, highest setting.
  2. Slightly score or tenderize flank steak.  Rub season, mustard and Worcestershire until well coated.
  3. Broil steak for 5 minutes on each side.  130-140 degree internal temp.  Remove steak and let rest for 10 minutes on a cutting board.
  4. Cutting against the grain, thinly slice on an angle.

Creamed Spinach
  • 1 stick Butter
  • 8 Tablespoons Flour
  • 1/2 whole Medium Onion, Finely Diced
  • 3 cloves Garlic, Finely Minced
  • 2 cups Milk
  • Salt And Pepper, to taste
  • 1 pinch Ground Nutmeg
  • 3 Tablespoons Butter
  • 24 ounces, weight Baby Spinach
  1. Melt 1 stick of butter in a pot. Sprinkle in flour and whisk together. Cook over medium heat for five minutes or until light golden brown. Throw in onion and garlic and stir together, cooking for another minute. Pour in milk, whisking constantly, and cook for another five minutes while you cook the spinach.
  2. To cook spinach, melt 3 tablespoons butter in a separate pot. Add spinach in increments until all incorporated, and cook until wilted but not soggy, about 4 to 5 minutes.
  3. Season the cream sauce with salt, pepper, and nutmeg. Add spinach to the cream sauce, stirring gently to combine. Serve immediately.

Tuesday, March 19, 2013

March Madness!

I've been a "New England-er" my whole life.  We have a beautifully colored fall, hot and humid summer days, shovel until your back aches winters and "who knows what the hell will happen" spring!  Right now we are experiencing the "who the hell knows".  I'm sure wherever you live, there is something to complain about.  "The grass is always greener" In this case its true!  We don't have green grass yet. HA HA.  Clearly the weather has affected my ability to provide a good joke.  Moving right along...

It's been snowing, sleeting, raining, snowing again.  This type of weather makes you want to stay inside, snuggle with that special someone and eat delicious food.  I don't know about you, the eating something delicious is the most appealing to me at the moment (I know my boyfriend would agree!).  Here are a few things I am looking for.  #1: Must be warm!!  #2: A little sweetness never hurt anyone.  Lastly, #4: Simple.  After a long day of work in this weather, I don't want to spend the rest of my evening in the kitchen.  Still need to snuggle with my special someone ;)

The winner is...drum roll please...


I used Granny Smith apples because they were on sale this week at the grocery store.  But you can use a mix of another apple.
Peeled, cored, and sliced
Mixed dry ingredients
Butter, slowly added to dry ingredients to create a light crumb
I used Maple Walnut ice cream to serve with my warm apple crisp.  HEAVEN!!


Warm Apple Crisp
  • 1 cup all-purpose flour
  • 3/4 cup rolled oats
  • 1 cup packed brown sugar
  • 1 teaspoon ground cinnamon
  • 1/2 cup butter, softened
  • 4 whole apples, peeled/cored/sliced
  • 1 cup sugar
  • 2 tablespoons cornstarch
  • 1 cup water
  • 1 teaspoon vanilla extract
  • ice cream, optional
  1. In a large bowl, combine first four ingredients. Cut in butter until crumbly. Press half into a greased 2-1/2-qt. baking dish or a 9-in. square baking pan. Cover with apples.
  2. In a small saucepan, combine the sugar, cornstarch, water and vanilla. Bring to a boil; cook and stir for 2 minutes or until thick and clear. Pour over apples. Sprinkle with remaining crumb mixture.
  3. Bake at 350° for 60-65 minutes or until apples are tender. Serve warm, with ice cream if desired. 

Friday, March 15, 2013

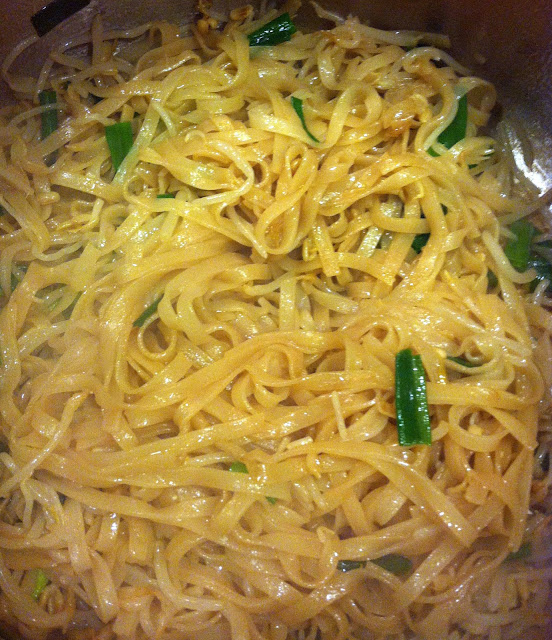
Chicken Pad Thai

"Hello, may I please have an order of Chicken Pad Thai??"

We all love take out.  But sometimes it can add up to a big chunk of change.  We usually get Chinese, Japanese or Thai cuisine for our choice of take out.  This time I was craving Thai!  I really love Chicken Pad Thai.  Such a simple dish and probably one of the most commonly known. Unfortunately, we don't have many Thai restaurants close to home.  What do you do in a situation like that??  Ignore your cravings and choose something else? NOPE!  You make it yourself!!!!


  • 1/2 pound narrow dried rice noodles
  • 2 ounces boneless chicken, thinly sliced and cut into small chunks or strips.
  • 1 teaspoon sugar (preferably palm sugar, although light brown or granulated will work just fine)
  • 1 heaping tablespoon tamarind pulp dissolved in 2 to 3 tablespoons warm water (or substitute 1 tablespoon rice vinegar plus 1 tablespoon water)
  • 1 tablespoon soy sauce
  • 1 tablespoon fish sauce
  • 3 large eggs
  • pinch salt
  • 3 tablespoons peanut oil or mild vegetable oil
  • 2 to 3 cloves garlic, minced
  • 1/2 pound (a scant 4 cups) bean sprouts, rinsed and drained
  • 3 scallions, trimmed, smashed with the flat side of a knife and cut into 1 1/2 inch lengths
  • 1 cup roasted peanuts, coarsely chopped 
  1. Soak the rice noodles in very, very warm water for 20 minutes.
  2. Meanwhile, place the chicken in a small bowl, add the sugar, and toss to coat. In a medium bowl, combine the tamarind water (or rice vinegar and water), soy sauce, and fish sauce. In a small bowl, lightly beat the eggs and a pinch of salt.
  3. Place a large wok or ginormous skillet over high heat. (You need a large wok to prepare this amount of noodles, as the noodles take up a lot of room, and you need to be able to push some ingredients up the sides of the wok while you cook other ingredients. If your wok is small, make this recipe in two batches.) Add about 1 1/2 tablespoons of the oil to the pan. When the oil is hot but not smoking, add the garlic and stir-fry briefly just until it begins to change color, about 15 seconds. Toss in the chicken and stir-fry until it changes color but aren’t cooked through, 1 minute or less.  Pour in the egg mixture and let it cook just until it starts to set around the chicken, less than a minute. Use your spatula to cut the omelet into large pieces, then transfer everything to a plate and set aside.
  4. Return the wok to high heat. Add the remaining 1 1/2 tablespoons oil and swirl to coat. Toss the drained noodles into the wok and stir-fry vigorously, pressing them against the hot wok briefly to sear them, then turn them and press them against the side of the wok again. The noodles will initially seem dry and unwieldy, but don’t worry, just keep folding them over and pressing them onto the wok - after about 1 minute, they will have softened more and be warm. Move the noodles up the sides of the wok and toss in 2 to 2 1/2 cups of the bean sprouts and the scallions. Stir-fry vigorously for about 20 seconds, pressing them against the hot wok and turning them so they wilt. Add the soy sauce mixture. Stir-fry for about another 30 seconds, gradually incorporating noodles into the bean sprout mixture. Add the reserved egg-meat mixture and toss gently to mix everything together.
  5. Turn the noodles out onto a platter or onto individual plates. Sprinkle some of the chopped peanuts onto the noodles.

Monday, March 11, 2013

Cocoa Cream Cheese Sandwiches

Cocoa powder...Butter...Cream cheese.......

What's wrong with those three words?? ABSOLUTELY NOTHING!!  And even better they're all together in one delicious treat.

Cocoa powder, flour, baking powder, baking soda and salt
Sugar, butter, buttermilk, egg, vanilla and apple cider vinegar
Butter and sugar until "light and fluffy"
Butter and sugar with eggs
Batter
1-inch rounds
Cream cheese and butter
Cream cheese, butter, vanilla, and powdered sugar
Use a piping bag to spread frosting on cakes
Most importantly: eat them before others eat them for you!!!

 Cocoa Cream Cheese Sandwiches
  • 1 1/3 cups all-purpose flour 
  • 2 tablespoons cocoa powder 
  • 1 teaspoon baking powder 
  • 1/4 teaspoon baking soda
  •  1/2 teaspoon salt 
  • 1/4 cup butter, room temperature 
  • 1 cup sugar 
  • 2 eggs 
  • 2 tablespoons buttermilk 
  • 2 teaspoons apple cider vinegar 
  • 1 teaspoon vanilla extract
For the cream cheese frosting: 
  • 1 pound cream cheese, softened
  • 2 sticks butter, softened
  • 1 teaspoon vanilla extract
  • 4 cups powdered sugar
  • 3/4 cup finely chopped almonds, walnuts, or pecans (optional) 
  1.  Preheat oven to 375 degrees F.
  2.  Mix together flour, cocoa powder, baking powder, baking soda and salt in a small bowl.
  3. Cream together the butter and sugar until light and fluffy, about 3 minutes. Add the eggs 1 at a time. Then beat in the buttermilk, vinegar, and vanilla. Once combined, add the dry ingredients to wet. Mix until thoroughly combined. 
  4. Onto a parchment lined sheet tray, drop batter using an ice cream scoop, forming 2-inch round circles. For small sandwiches, use a 1-inch round scoop.
  5. Bake for 10 minutes, until baked through. Cookies should be cake-like and light. Allow to cool for a few minutes on the baking sheet, then remove to a wire rack to cool completely.
  6. For the Cream Cheese Frosting:  In a large mixing bowl, beat the cream cheese, butter, and vanilla together until smooth. Add the sugar and on low speed, beat until incorporated. Increase the speed to high and mix until very light and fluffy.
  7. Spread the cream cheese frosting between 2 cooled cookies and roll the edges in finely chopped nuts, if desired.

Sunday, March 10, 2013

White bean ravioli topped with spinach, goat cheese and bacon


I'm starting to get hungry.  How about you?

If you don't know by now, I love to cook!  Nothing gives me greater pleasure than cooking for my family and friends.  Creating something that makes others happy is more gratifying to me then anything else.

Food can represent so many things to us.  It's no longer just a means for survival. Smelling a fragrant aroma or eating a particular ingredient can bring on memories of that trip to Europe or holiday you spent with family and friends.  Meals were important part of my family growing up.  We had traditional sit down dinners while discussing our day to day.  It also meant I wasn't able to leave the table until I ate everything on my plate!! I wasn't always open to all food.  I spent many hours alone awaiting my punishment because I was too stubborn to eat those pesky vegetables.  Ironically enough, there isn't a food I wouldn't try now! 

This new pasta adventure started with my boyfriend.  He loves pasta!  A few weeks ago I made Ricotta and Spinach Stuffed Shells (don't worry, I will post that recipe soon!).  Those shells didn't stand a chance against him.  Half the dish was gone before I could say "How are they?"  Proud that my food made him happy, I was anxious to create the next meal.

I recently purchased a ravioli press and couldn't wait to try it out.  Once you get the dough part down, it's very easy to experiment with all the fillings.  I could of easily done a classic cheese but decided to indulge my creativity.

Let the adventure begin....


Ravioli Dough (using ravioli maker and press)
  • 3 cups all purpose flour
  • 1/2 teaspoon salt
  • 2 eggs
  • 1/4 cup olive oil
  • 1/2 cup water
  • Flour for dusting
  1. In a small bowl, beat eggs.  Add water, oil and salt and mix together.
  2. Add egg mixture into mixing bowl.  Slowly add flour until dough is formed.
  3. On a lightly floured work space, knead dough until smooth.  Roll out until thin and translucent.  Dust lightly with flour.  Use the ravioli maker or press as a template to cut out strips for both the top and bottom of ravioli.  You should get 4 rectangular strips each about 12" x 4"
White Bean filling
  • 1 (15-ounce) can cannellini beans
  • 1 egg
  • 3 tablespoons balsamic vinegar
  • 1/2 cup freshly grated Parmesan 
  • 1/2 tablespoon chives, chopped
  • 1/4 cup caramelized onions, finely diced 
  1. Puree cannellini beans, egg, balsamic vinegar and parmesan
  2. Add caramelized onions to bean mixture
Ravioli assembly
  1. Place one strip of dough over the frame. 
  2. Press dough into frame with the indented tray.
  3. Fill pouches with white bean filling.  Place a second strip of pasta dough over strip with filling and press strips together with your fingers.
  4. Seal by running a rolling pin over the top of the dough covered frame, gently at first and then increase pressure until the zig-zag edges of the frame are visible through the pasta.
  5. Remove ravioli from frame by tapping on counter.
  6. Trim out squares using a ravioli wheel or knife.  Remove excess dough and re-roll.  Repeat procedure until dough and filling are used.  Place ravioli on a heavily floured cookie sheet and let dry for 1 hour.  Turn over and let dry another hour.  (If you want to make the ravioli ahead, freeze at this point.  If frozen, make sure to thaw before cooking)  Cook ravioli 8 minutes or until tender (cooking time will vary with thickness of dough)
  7. Drain and place on serving platter.
  8. Drizzle with olive oil
  9. Add spinach on top of ravioli.  Crumble goat cheese and top with crispy bacon pieces.
Spinach, Goat Cheese and Bacon topping
  • 4 cups baby spinach
  • 3 cloves of garlic, diced
  • oil for sauteeing
  • 4 tablespoons of goat cheese, crumbled and set aside.
  • 6 strips of bacon
  1. Saute baby spinach until wilted.  Remove from pan and roughly chop.  Put back in pan and saute with garlic.
  2. Bake the bacon until crispy (I cook until almost down, dry on paper towel and then return back to pan to continue cooking).  Once at desired crispness, chop into bits.

Thursday, March 7, 2013

Rate That Restaurant!

It's time to play Rate That Restaurant!!!!  
Today's feature: Not Your Average Joe's.  

WARNING!!! Please be advised opinions that may differ from your own will be expressed.  Statements below have not been collected in a survey or any official capacity.  They are what they are, opinions.  Nothing more, nothing less.  "Bahhhhh"


Since this was my first time rating the restaurant I wanted to keep the meal very simple.  All American cheeseburger.  I decided on the burger for several reasons.  One of which was simplicity.  In my opinion, if a restaurant can't handle making the simple stuff how will they handle the Filet or some various seafood dishes.  This is where a lot of restaurants go wrong.  Attempting to keep up with higher end establishments, chain restaurants seem to flop in my experience.  They spend so much time creating the "new and cool" trends they lose all focus on basic menu items.  OYE! I can go on forever with this topic.  But lets get back to the burger.  The burger was called "backyard burger".  The description states "hand-formed daily and served on a toasted roll".  You have your choice of: american, blue, cheddar, swiss or pepperjack cheese and country bacon.  I chose american to go on my burger.  Why you ask?  Think to yourself about the number of people in our country that go to McDonald's or Burger King.  What kind of cheese do they use? American or more officially called, processed cheese!  Certainly a better quality cheese like cheddar or a pepperjack can compliment the flavor of a juicy burger.  However, I look at it as a sit down restaurant that makes "hand-formed" burgers daily can't make a halfway decent burger even WITH a tiny slice of processed cheese, well they are no better than your local fast food joint.

Footnote: I did in fact dip a fry in the ketchup and put the 2 pickles on the burger before taking the picture.  You'll never meet a dishonest goat


Lets start off with the cons first.  I never like to end on a negative note

Cons:
  • The claimed "toasted roll" felt like I was holding onto a stick of butter.  You most certainly can toast a bun without using that much grease.  A burger in general isn't the healthiest menu choice.  But why make it worse?  A little more bread and a little less "Slick Rick".
  • So much for that "tiny piece" of processed cheese! There were 2 thick pieces. I did manage to scrape off a good amount.  Don't get me wrong, I LOVE CHEESE.  However, even a great quality cheese should not over power the burger.  Sorry for the person that ordered a grilled cheese, I got your cheese!!!
  • Although just a side, the fries could have been better.  Who doesn't love that crisp outside and soft potato inside of a glorious fry?!  Not here!  The fries were a little soggy and on the cold side to boot.  Burger and fries compliment each other well when done right.  It's a marriage like no other.  Too bad I couldn't experience this blissful matrimony.
Pros:
  •  Kudos to the crispy lettuce, tomato and pickle accompaniments! I do love the cool crunch aspect of a burger.
  • The hamburger itself wasn't bad.  I ordered it medium.  It was a little closer to the well done side for my taste  (you can't tell by the picture because half my burger was brown and the other had slight pink; uneven cooking)  But the meat itself wasn't greasy and although it didn't have an amazing flavor it wasn't tasteless. 
Overall I give this burger a 5 out of 10.  I've had better, but certainly had worse.  Maybe they should change it to "middle of the road burger". 

Wednesday, March 6, 2013

Wednesday Wheats

Sniff Sniff...Is that fresh bread you smell??  Yes, it is!!!!!  Who doesn't love the smell of freshly baked bread. Whats even better than smelling it?  EATING IT!!  Bread finds us in many ways--our sandwiches, our morning toast, that amazing custard bread pudding that you dream of and even as our crispy Mac n' Cheese topping.  Maybe what makes us love and appreciate good quality bread is the level of commitment it takes to get those amazing results.  I, like most home chefs, appreciate a challenge as much as the next.  However, we all have those moments "I want bread.  But just worked a long day at work! The last thing I want to do is bake.  Grocery store here I come!!!!"  We settle for store bought for the convenience.  But why can't we indulge in that fresh-right from the oven-bread and avoid spending long, my arms are so sore from kneading, hours in the kitchen??  WE CAN HAVE IT ALL!!  There are many amazing recipes out there to allow you that luxury.  

Honey Wheat Bread

Yeast, water and honey

Flour (yes, I know "Captain Obvious!")
Use a mixer if you have one!  (Thanks to my boyfriend for buying me one! "Thanks, honey!!")
Mix until well incorporated.  The dough will have a sticky consistency.

I used 1 cake pan to make one ridiculously large loaf of bread. But you can split it up between 2 pans.
Voila!! Fresh honey wheat bread


Honey Wheat Bread

3 cups warm water, 110 - 120 degrees F
2 packets instant dry yeast
1/4 cup honey
6 cups unbleached white whole wheat flour 
2 teaspoons salt

  1. Grease two 8 1/2 inch by 4 1/2 inch by 2 1/2 inch loaf pans
  2. Combine warm water, yeast and honey. Stir to dissolve yeast.
  3. In a large bowl, mix together flours and salt. Pour liquid into dry ingredients. Mix thoroughly -- dough will be sticky. 
  4. Divide dough equally between pans. Let stand in a warm spot for 20 minutes until slightly risen.
  5. Bake in a 400 degree F oven for 40 minutes. The bottom of the loaves will sound hollow when tapped.
  6. Turn out of pans and cool on a rack.